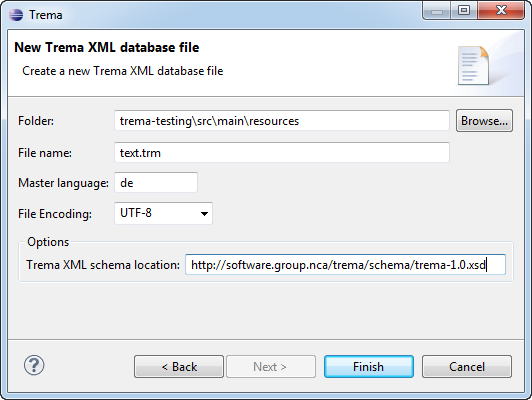
Using the Trema editor
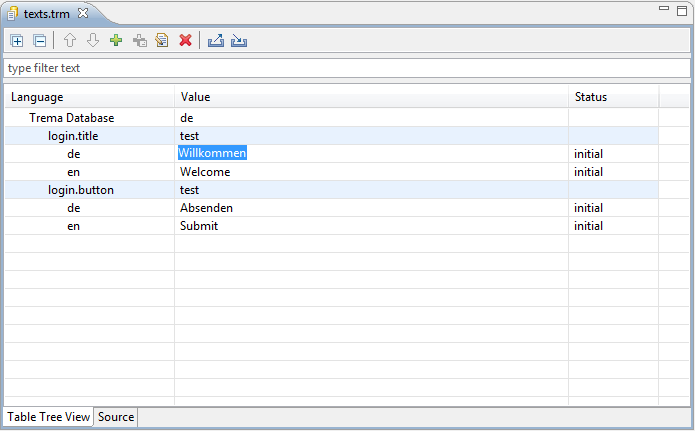
The Trema editor offers two different panes to view/edit the contents of the database: A table tree editor and a source (xml) editor. Editors can be switched by using the tabs below the editor pane.
Table Tree Editor
Allows guided editing of the trm file:
- All available actions can be accessed using the toolbar (new keys, values, import / export, etc.)
- Searching/filtering in the database can be done using the filter input area (key, value, language, context and status are used to match the filtering criterion)
- Keys, values, states and context information can be edited directly in the table
- Quick navigation through editable cells is possible using the Tab / Shift+Tab keys (pressing tab when the focus is in an editable cell, will move the focus to the next editable cell)
- Any escaping needed is done by the editor (newlines, ampersands, brackets, etc.)
The following actions are available through the editor toolbar (and context menu). Availability of an action depends on the current selection.
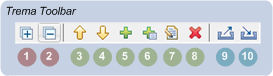
- Expand Tree: Expands the tree so that all values are visible
- Collapse Tree: Hides all expanded values
- Move Node Up: Moves a text node up one row in the table (Ctrl+Alt+U)
- Move Node Down: Moves a text node down one row in the table (Ctrl+Alt+D)
- Add Text Node: Adds a new text node (key and values). (Ctrl+Alt+N)
- Add Value Node: Adds a new value to an existing text node (Ctrl+Alt+V)
- Edit Text: Allows to edit keys/values. Usually keys and values are edited directly in the table, however the edit dialog is useful to edit multiline text values. (Ctrl+Alt+E)
- Remove Node: Removes a value or text node (Ctrl+Alt+R)
- Export Text: Opens the export dialog, allowing to export the database to xls
- Import Text: Opens the import dialog, allowing to import values from xls
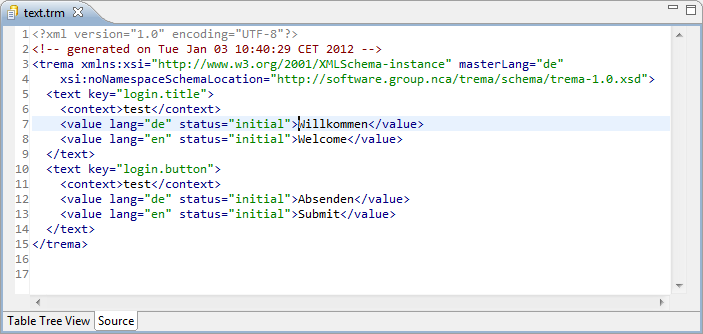
XML Editor
Allows direct access to the Trema xml file. Note that proper xml escaping in any of the texts needs to be done manually when this editor is used.
Import conflict resolution
Merging text resources from an xls file back into the Trema database might lead to conflicts, for example:
- new keys where added to the xls by the translator
- a text resource is in a state that does not allow it to be overwritten by an import
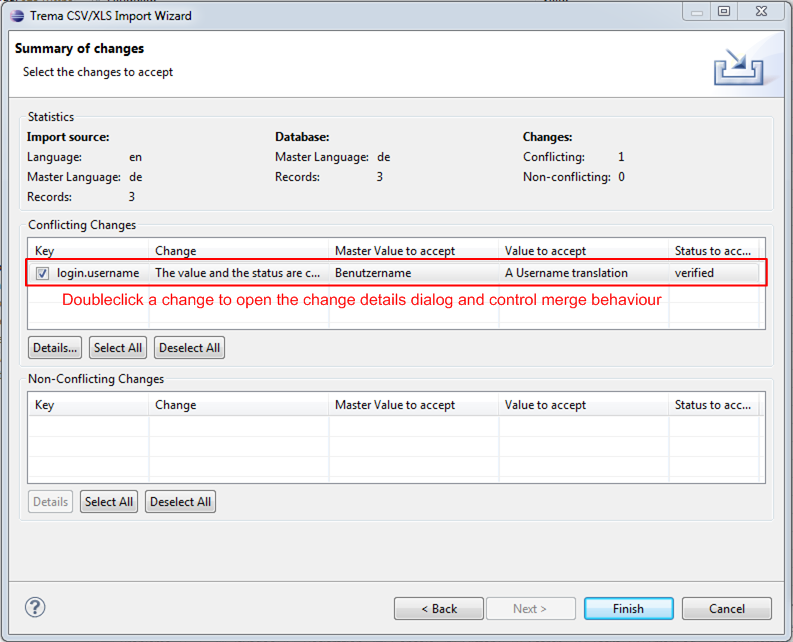
During the import process, all changes are presented to the developer (a change as a whole might include a status change, a value change and a master value change, see details dialog). A change can either be 'non-conflicting' or 'conflicting':
- Non-conflicting: Expected changes. No manual intervention is normally needed, e.g. a value that was translated
- Conflicting: Non-expected changes that need conflict resolution
Depending on the severity of the conflict, a conflicting change can be acceptable or non-acceptable.
The following screenshot shows the Summary of changes dialog that shows all detected changes between an import source (xls) and the database.
For each acceptable change, the merge behaviour can be controlled using the Change details dialog (which can be opened by double clicking on a row in the list). Each element of the change (state, value, mastervalue) can be accepted from either the xls or the database.
Non-acceptable changes are refused by design and will not be imported. In case this is still needed for whatever reason, manually adjusting the xls or database before the import is necessary.
The following screenshot shows an example of the Change details dialog.
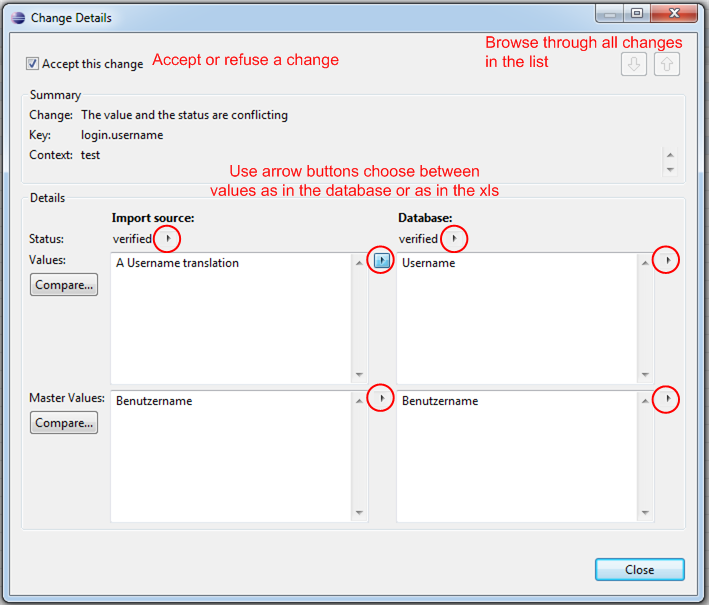
The dialog allows to
- Generally accept or refuse importing a change into the database
- When accepting a change, differences between the database and import source can be individually accepted or refused (e.g. accepting the translated text from the xls, but keeping the state from the database)
- Browse through the list by using the up and down arrows